


When your trusty computer refuses to start or behaves erratically, a wave of frustration can quickly set in. Among the most daunting culprits are issues related to the Basic Input/Output System (BIOS) or the motherboard itself. These components are fundamental to your PC’s operation, and a problem with either can lead to significant headaches. Distinguishing between a BIOS hiccup and a more severe motherboard ailment is crucial for effective troubleshooting and repair.
Understanding the Critical Roles: BIOS vs. Motherboard
Before we dive into diagnostics, it’s essential to grasp what the BIOS and motherboard do and how they interact.
What is the BIOS? ⚙️
The BIOS (Basic Input/Output System) is a type of firmware, which is essentially software embedded directly into a hardware component. In this case, the BIOS resides on a small chip, typically a CMOS (Complementary Metal-Oxide-Semiconductor) chip or an EEPROM (Electrically Erasable Programmable Read-Only Memory) chip, located on the motherboard.
Its primary responsibilities include:
- POST (Power-On Self-Test): This is the first thing the BIOS does when you power on your computer. It performs a series of diagnostic checks on essential hardware components like the CPU, RAM, graphics card, and keyboard. If any critical component fails the POST, the BIOS will usually alert you, often via beep codes or on-screen messages (if the display is initialized).
- Hardware Initialization: The BIOS initializes and configures your system’s hardware, making it ready for the operating system. This includes setting up clock speeds, enabling or disabling integrated peripherals, and detecting storage devices.
- Bootstrapping: After a successful POST, the BIOS searches for a bootable operating system on your storage devices (hard drive, SSD, USB drive) according to a predefined boot order. Once found, it hands over control to the operating system’s bootloader.
- Providing a Basic Interface: The BIOS provides a setup utility (often accessed by pressing keys like Del, F2, F10, or Esc during startup) that allows users to configure hardware settings, system time, boot priorities, and other low-level parameters.
A healthy BIOS is paramount for a computer to even begin the process of starting up.
What is the Motherboard? 🛠️
The motherboard, also known as the mainboard, system board, or logic board, is the central nervous system of your computer. It’s a large printed circuit board (PCB) that houses and connects virtually all other critical components of your PC.
Key functions and components of a motherboard include:
- Component Hub: It holds the CPU (Central Processing Unit) in its socket, RAM (Random Access Memory) in its slots, and provides expansion slots (like PCIe) for graphics cards, sound cards, and other peripherals.
- Interconnectivity: It provides the electrical pathways (traces) and data buses for all components to communicate with each other.
- Power Distribution: It distributes power from the Power Supply Unit (PSU) to the CPU, RAM, chipset, and other connected components via various connectors and voltage regulator modules (VRMs).
- Chipset: This crucial set of integrated circuits manages data flow between the CPU, RAM, storage, and peripheral devices. Modern chipsets often integrate functionalities like USB controllers, SATA controllers, and network interfaces.
- Connectors: It features a plethora of internal and external connectors for storage drives (SATA, M.2), USB devices, audio jacks, Ethernet ports, and display outputs (if an integrated GPU is present).
A faulty motherboard can manifest in a myriad of ways, from a completely dead system to erratic behavior of specific components.
The Interdependent Relationship
The BIOS and motherboard are intrinsically linked. The BIOS firmware is stored on a chip on the motherboard, and it’s specifically designed for that particular motherboard model or series. Without a functioning BIOS, the motherboard cannot initialize hardware. Conversely, if the motherboard has a critical hardware failure (e.g., a damaged CPU socket or a failed chipset), even a perfect BIOS won’t be able to make the system work. This close relationship is what often makes diagnosing issues so challenging.
Common Symptoms of PC Malfunctions (Potentially BIOS or Motherboard Related)
When trouble strikes, your PC might exhibit a range of symptoms. Many of these can point to either BIOS or motherboard issues, or sometimes even other components. Here are some common red flags:
- No Power at All: You press the power button, and absolutely nothing happens – no fans spin, no lights turn on.
- Power On, But No Display (Black Screen): The fans spin, lights may illuminate, but there’s no image on the monitor. This is often referred to as a „no POST” situation.
- Beep Codes During Startup: A series of short or long beeps emanating from the internal PC speaker. These codes are diagnostic signals from the BIOS.
- Error Messages on Screen: If the display initializes, you might see specific error messages related to the BIOS, CMOS, or hardware detection.
- Freezing or Crashing: The system randomly freezes or crashes, sometimes leading to a Blue Screen of Death (BSOD) in Windows or a kernel panic in Linux/macOS.
- Random Reboots: The computer restarts unexpectedly without any user input.
- Failure to Recognize Peripherals: USB ports, storage drives (HDDs/SSDs), or expansion cards are not detected or work intermittently.
- BIOS Settings Not Saving: Changes made in the BIOS setup utility are lost after a reboot.
- Incorrect System Date and Time: The system clock constantly resets.
- System Instability, Especially Under Load: Problems become more apparent when the PC is performing intensive tasks.
- Burning Smell: A distinct acrid or electrical burning odor. ⚠️ This is a critical sign – power off immediately!
Recognizing these symptoms is the first step. The next is to narrow down the source.
Diagnosing BIOS Failures: Tell-Tale Signs and Troubleshooting Steps 🕵️♂️
BIOS failures can be subtle or catastrophic. They often stem from corruption of the firmware, a failed BIOS chip, incorrect settings, or issues with the CMOS battery.
1. Corrupted BIOS
A corrupted BIOS is one of the most common BIOS-related problems. The firmware data stored on the BIOS chip can become damaged, leading to a variety of boot issues.
-
Symptoms:
- The system attempts to boot but gets stuck in a loop (boot looping).
- Failure to complete the POST, sometimes with a specific error message like „BIOS ROM checksum error,” „BIOS image corrupted,” or similar.
- The system powers on, fans spin, but there’s no video output, and potentially no beep codes if the corruption is severe.
- Inability to access the BIOS setup utility.
- Previously working hardware suddenly isn’t recognized correctly.
- The system may power on but show absolutely no signs of life on the screen, even if fans are spinning.
-
Common Causes:
- Failed BIOS Update: This is a prime culprit. If a BIOS update process is interrupted (e.g., power outage, system crash during flashing) or if the wrong BIOS file is used, the firmware can be left in an unusable state.
- Power Surges or Outages: Sudden power fluctuations can, in rare cases, corrupt the BIOS data.
- Malware: Certain aggressive rootkits or malware (though rare) could theoretically attempt to tamper with the BIOS.
- Software Incompatibility: Very rarely, certain low-level software might interact badly with the BIOS.
-
Troubleshooting Corrupted BIOS:
- 💡 Clear CMOS: This is often the first and simplest step. Clearing the CMOS resets the BIOS settings to their factory defaults. It doesn’t fix a corrupted BIOS image itself, but if the issue was due to incorrect settings causing instability that looked like corruption, this can help. You can usually clear CMOS by:
- Using a dedicated jumper on the motherboard (refer to your motherboard manual).
- Removing the CMOS battery for a few minutes and then reinserting it (with the PC unplugged from mains power). For more detailed instructions, you can check a guide like How to Clear CMOS (Reset BIOS) from Lifewire.
- BIOS Recovery Options: Many modern motherboards have built-in BIOS recovery features:
- Dual BIOS: Some motherboards have two BIOS chips – a main one and a backup. If the main BIOS becomes corrupted, the system can automatically (or manually via a switch/jumper) boot from the backup BIOS and potentially restore the main one.
- USB BIOS Flashback (or similar names like Q-Flash Plus): This feature allows you to flash the BIOS even without a CPU or RAM installed. You download the BIOS file to a USB drive, rename it as specified by the manufacturer, insert it into a designated USB port, and press a specific button on the motherboard (often on the rear I/O panel). This is invaluable if the system is otherwise unbootable.
- Re-flashing the BIOS: If the system can boot to some extent (e.g., to a DOS prompt from a USB drive, or if the BIOS has a built-in flashing utility like EZ Flash or M-Flash accessible during POST), you can attempt to re-flash the correct BIOS version. Extreme caution is advised during this process. Ensure you have the exact correct BIOS file for your motherboard model and revision.
- External Programmer: If the BIOS chip is socketed (rare nowadays for consumer boards) or if you have advanced soldering skills and equipment, the chip can sometimes be removed and reprogrammed using an external SPI programmer. This is a last resort for DIY and often requires professional help.
- 💡 Clear CMOS: This is often the first and simplest step. Clearing the CMOS resets the BIOS settings to their factory defaults. It doesn’t fix a corrupted BIOS image itself, but if the issue was due to incorrect settings causing instability that looked like corruption, this can help. You can usually clear CMOS by:
2. Failed BIOS Chip
Sometimes, the physical BIOS chip itself can fail due to an electrical fault or physical damage.
-
Symptoms:
- Complete inability to POST. The system powers on (fans might spin, lights might turn on), but there’s absolutely no activity beyond that – no beeps, no video.
- The system behaves as if there’s no BIOS at all.
- May be indistinguishable from a severely corrupted BIOS or a dead motherboard without further testing.
-
Common Causes:
- Electrical failure of the chip itself (e.g., due to a power surge).
- Physical damage to the chip or its soldering (very rare without mishandling).
- End of life for the chip (also rare, but possible).
-
Troubleshooting Failed BIOS Chip:
- Diagnosis is difficult without specialized tools.
- If the chip is socketed, replacement might be possible (finding a pre-programmed chip for your specific model can be challenging).
- If the chip is soldered (most common), it requires expert micro-soldering skills to replace.
- Often, a failed BIOS chip means motherboard replacement is the most practical solution for average users.
3. Incorrect BIOS Settings
User-configured settings within the BIOS can sometimes lead to instability or boot failures.
-
Symptoms:
- Failure to boot the operating system (e.g., „No bootable device found”).
- Peripherals (like USB drives, specific SATA ports) not working.
- System instability, crashes, or freezes, especially after changing settings like RAM timings, CPU overclocking, or boot modes (UEFI/Legacy).
- System powers on but then immediately powers off or reboots.
-
Common Causes:
- Aggressive or incorrect overclocking of CPU or RAM.
- Incorrect boot order or boot mode settings.
- Disabling essential controllers or ports.
- Setting incompatible RAM timings or voltages.
-
Troubleshooting Incorrect BIOS Settings:
- Reset BIOS to Default Settings:
- Enter the BIOS setup utility during startup (usually by pressing Del, F2, F10, or Esc). Look for an option like „Load Optimized Defaults,” „Load Fail-Safe Defaults,” or „Reset to Default.” Save and exit.
- If you cannot access the BIOS menu, perform a Clear CMOS procedure as described earlier (jumper or battery removal). This will revert all settings to their factory defaults.
- Reset BIOS to Default Settings:
4. CMOS Battery Failure 🔋
The CMOS battery (typically a CR2032 coin cell) powers the CMOS chip that stores BIOS settings and the system’s real-time clock (RTC) when the PC is turned off.
-
Symptoms:
- The system loses the date and time every time it’s powered off and unplugged.
- BIOS settings revert to default on every boot-up.
- You might see error messages on startup like „CMOS Checksum Error,” „CMOS Date/Time Not Set,” or „Press F1 to load defaults and continue.”
- Occasional boot issues or failure to recognize drives if settings crucial for them are lost.
-
Common Causes:
- The CMOS battery is depleted (they typically last 3-7 years).
-
Troubleshooting CMOS Battery Failure:
- This is usually a simple fix: Replace the CMOS battery.
- Power off and unplug your computer.
- Open the computer case and locate the coin-cell battery on the motherboard.
- Carefully remove the old battery (note its orientation, usually „+” side up).
- Insert a new CR2032 battery.
- Close the case, plug in, and power on. You’ll likely need to enter the BIOS setup to reconfigure basic settings like date/time and boot order.
- This is usually a simple fix: Replace the CMOS battery.
Diagnosing Motherboard Failures: Uncovering Hardware Issues 🛠️
Motherboard failures can be more diverse and often more severe, as they involve physical hardware components.
1. Physical Damage
Obvious physical damage is a clear indicator of a motherboard problem.
-
Symptoms:
- No power at all, or immediate shutdown after powering on (short circuit protection).
- Burning smell.
- Visible signs of damage:
- Burnt components: Discolored or charred spots on the PCB or on chips.
- Bent pins: Especially in the CPU socket (very delicate) or on connectors.
- Damaged traces: Scratched or broken conductive pathways on the PCB.
- Leaking or bulging capacitors: (Covered next).
- Cracked PCB.
-
Common Causes:
- Mishandling during installation or component replacement (e.g., dropping a screwdriver, forcing components).
- Severe power surges or lightning strikes.
- Component failure elsewhere causing cascading damage (e.g., a faulty PSU frying the motherboard).
- Liquid spills.
-
Troubleshooting Physical Damage:
- Thorough visual inspection: Use a bright light and perhaps a magnifying glass. Check around screws, connectors, and major components.
- If damage is found, component-level repair is usually not feasible for end-users (e.g., fixing traces, replacing surface-mounted components without specialized skills).
- Motherboard replacement is almost always the solution for significant physical damage.
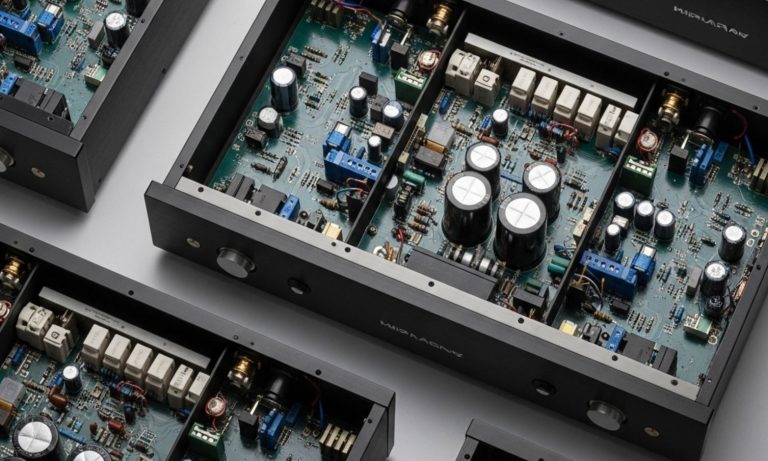
2. Capacitor Issues (Bulging or Leaking)
Capacitors are small cylindrical components that store and regulate electrical charge. Failing capacitors are a common motherboard ailment, especially on older or heavily used boards.
-
Symptoms:
- System instability: random crashes, freezes, BSODs.
- Random reboots or failure to power on consistently.
- Whining or high-pitched noises from the motherboard area.
- Visual evidence:
- Bulging tops: The top of the capacitor, which should be flat, is domed or bulging outwards.
- Leaking electrolyte: A crusty, brown, or dark substance around the base or top of the capacitor.
- Sometimes they can even pop open.
-
Common Causes:
- Age and wear (capacitors have a finite lifespan).
- Excessive heat within the PC case.
- Poor quality capacitors used by the manufacturer (less common now but was an issue in the past – the „capacitor plague”).
- Power supply issues providing unstable voltage.
-
Troubleshooting Capacitor Issues:
- Visual inspection: Carefully examine all capacitors on the motherboard, especially around the CPU (VRM area) and RAM slots.
- If only a few capacitors are bad and you have good soldering skills, they can be replaced. You must use capacitors with the exact same capacitance (µF) and voltage (V) ratings, and preferably low ESR (Equivalent Series Resistance) types designed for motherboards.
- For most users, or if many capacitors are affected, motherboard replacement is the more practical option.
3. Chipset Failure
The chipset (e.g., Intel’s Z790, AMD’s B650) is a vital controller on the motherboard. If it fails, various critical functions will be affected.
-
Symptoms:
- Problems with SATA ports (drives not detected, slow performance).
- USB ports not working or malfunctioning.
- Integrated network (Ethernet) or audio not working.
- General system instability that isn’t tied to CPU, RAM, or GPU.
- Failure to boot, potentially with no display or specific error codes (if the BIOS can still report them).
- Overheating of the chipset heatsink (use caution when checking).
-
Common Causes:
- Overheating (due to poor airflow, fan failure on the chipset heatsink if present, or dust buildup).
- Electrical failure or static discharge.
- Manufacturing defect.
-
Troubleshooting Chipset Failure:
- This is very difficult to diagnose definitively without swapping motherboards.
- Ensure chipset drivers are up to date (if the system boots).
- Check chipset temperatures using monitoring software (if the system boots). Ensure its heatsink is properly attached and clean.
- If multiple integrated components managed by the chipset (USB, SATA, LAN) are all failing simultaneously, it strongly points to a chipset issue.
- Typically, a confirmed chipset failure means motherboard replacement.
4. VRM (Voltage Regulator Module) Failure
VRMs are responsible for providing clean and stable power to the CPU. If they fail, the CPU won’t operate correctly.
-
Symptoms:
- System fails to power on or shuts down immediately after powering on.
- Instability or crashes, especially under CPU load (e.g., gaming, video rendering).
- CPU not being detected or reported incorrectly.
- Overheating in the VRM area (near the CPU socket, often covered by heatsinks).
- Sometimes, a burning smell if a VRM component catastrophically fails.
-
Common Causes:
- Overheating, especially with aggressive CPU overclocking without adequate VRM cooling.
- Poor quality VRM components.
- Power supply issues.
- Age and wear.
-
Troubleshooting VRM Failure:
- Visually inspect the VRM area for burnt components or damaged capacitors.
- If overclocking, revert CPU to stock settings.
- Ensure good airflow over the VRM heatsinks.
- A failed VRM usually necessitates motherboard replacement. Repair is highly specialized.
5. Damaged Sockets or Slots (CPU, RAM, PCIe)
Physical damage to the CPU socket, RAM slots, or PCIe expansion slots can prevent components from working correctly or at all.
-
Symptoms:
- CPU Socket (e.g., bent pins in an LGA socket): CPU not detected, failure to POST, system won’t power on. This is one of the most delicate parts.
- RAM Slots: RAM not detected (or only some modules), system fails to POST (often with RAM-related beep codes), instability.
- PCIe Slots: Graphics card or other expansion cards not detected, graphical artifacts (if GPU related), system instability.
- Visible physical damage: bent pins, cracked plastic, debris in the slot.
-
Common Causes:
- Incorrect installation of CPU, RAM, or expansion cards (e.g., forcing them, not aligning them properly).
- Accidental damage during handling or cleaning.
- Manufacturing defect (rare).
-
Troubleshooting Damaged Sockets/Slots:
- Careful visual inspection is key. Use a flashlight and magnifying glass.
- For bent CPU socket pins (LGA): Attempting to straighten them is extremely risky and can easily cause more damage. It requires immense patience, a very fine non-metallic tool (like a plastic toothpick), and a steady hand. Often, it’s better to seek professional help or replace the motherboard.
- For RAM/PCIe slots: Ensure they are clean and free of debris. Test with known good RAM/cards. If a specific slot is faulty, you might be able to use other available slots, but if the primary slot (e.g., main GPU slot) is damaged, it’s a significant issue.
- Often, motherboard replacement is the safest and most reliable solution.
6. Port Failures (USB, Ethernet, Audio)
Individual external or internal ports can fail.
-
Symptoms:
- One or more USB ports don’t recognize devices.
- Ethernet port doesn’t connect or has intermittent connectivity.
- Audio jacks produce no sound, static, or distorted sound.
-
Common Causes:
- Physical damage to the port (bent pins, broken connector).
- Electrical surge damaging the port controller.
- Driver or software issues (always rule these out first!).
- Failure of the specific controller chip on the motherboard.
-
Troubleshooting Port Failures:
- Test with multiple known good devices and cables.
- Update or reinstall drivers for the problematic port/device.
- Check BIOS settings to ensure the port/controller is enabled.
- Visually inspect the port for physical damage.
- If it’s a hardware failure of an integrated port, you might consider using an add-in expansion card (e.g., a USB card, a sound card, a network card) if slots are available. Otherwise, it could mean motherboard replacement if the port is essential.
Key Differentiating Factors and Overlapping Symptoms 🔄
It’s challenging because many symptoms overlap. However, some patterns can help you lean one way or the other:
- POST Behavior & Beep Codes: This is a strong early indicator.
- No POST, no beeps, fans spin: Could be severe BIOS corruption, dead BIOS chip, dead CPU, or a critical motherboard fault (e.g., VRM, chipset).
- Specific beep codes: These are BIOS-generated. Consult your motherboard manual (or a general guide if the manual is unavailable). Beep codes often point to RAM, GPU, or the BIOS itself. A continuous series of beeps or specific patterns can indicate BIOS corruption.
- POST starts but hangs or shows an error: If you see text on screen, the basic video initialization part of the BIOS is working. Errors here can be BIOS-related („BIOS ROM checksum error”) or point to hardware detected by the BIOS (e.g., „Keyboard error,” „Drive not found”).
- BIOS Accessibility:
- Can you enter the BIOS setup utility? If yes, the core BIOS is likely somewhat functional. The problem might be incorrect settings, a failing CMOS battery, or a motherboard issue affecting peripherals or stability after the initial BIOS routines.
- Cannot enter BIOS setup? This leans more towards a BIOS corruption/failure or a severe motherboard issue preventing even basic initialization.
- Scope of the Problem:
- Multiple, seemingly unrelated issues (e.g., USB ports failing, SATA drives disappearing, network dropping) often point to a motherboard problem (chipset, power distribution).
- Problems strictly related to booting or saving settings are more indicative of BIOS issues (corruption, CMOS battery).
- „It was working, now it’s not after X”:
- After a BIOS update attempt: Very strong pointer to BIOS corruption.
- After a power outage/surge: Could be either. Motherboards are sensitive, but BIOS can also get corrupted. Look for other signs (e.g., burnt smell for motherboard, CMOS checksum error for BIOS).
- After installing new hardware: Could be a compatibility issue requiring a BIOS update (ironically), incorrect BIOS settings for the new hardware, or physical damage to a slot/socket during installation (motherboard).
- Gradual degradation of stability: Often points to failing capacitors or other components on the motherboard deteriorating over time.
- CMOS Battery Symptoms vs. BIOS Corruption:
- Losing time/date and settings that are easily reconfigured = CMOS battery.
- System unbootable, „BIOS checksum error” = Likely BIOS corruption. While a very weak battery could theoretically lead to checksum errors if settings are badly garbled, it’s less common than firmware corruption.
Systematic Troubleshooting Approach 📋
When faced with these issues, a methodical approach is key. Rushing can lead to misdiagnosis.
- Safety First! ⚠️ Before opening your PC case or reseating components, ensure it’s powered off and disconnected from the mains electricity. Ground yourself to prevent electrostatic discharge (ESD), which can damage components.
- Check External Basics:
- Ensure monitor is on and connected correctly. Try a different monitor cable.
- Check power cables to PC and monitor.
- Remove all external USB devices except keyboard and mouse (if needed for BIOS access).
- Listen and Observe (Initial Power On):
- What happens when you press power? Any lights? Fans spin? Any beeps? Any smell?
- Simplify the System (Minimal Configuration): This helps isolate the faulty part.
- Disconnect all non-essential components:
- Secondary hard drives/SSDs (leave only the boot drive if you can get that far).
- All expansion cards except the graphics card (if you don’t have integrated graphics). If you have integrated graphics, remove the dedicated graphics card.
- All but one RAM stick (try it in different slots, refer to manual for primary slot).
- Disconnect front panel USB, audio, and other unnecessary internal connectors.
- The goal is to try and boot with the absolute minimum: Motherboard, CPU (with cooler), one RAM stick, GPU (if needed), PSU, and keyboard.
- Disconnect all non-essential components:
- Visual Inspection (Internal):
- Open the case and carefully inspect the motherboard for any signs of physical damage: bulging/leaking capacitors, burnt spots, loose connections, bent pins.
- Reseat Components: Sometimes connections become loose.
- Carefully reseat the RAM module(s).
- Reseat the graphics card.
- Check that CPU power connectors (4/8-pin) and motherboard power connector (24-pin) are firmly seated.
- Check SATA data and power cables.
- Clear CMOS / Reset BIOS Defaults: As described earlier, use the jumper or remove/reinsert the CMOS battery. This is crucial for ruling out misconfigured settings.
- Interpret Beep Codes / Diagnostic LEDs:
- If you hear beep codes, consult your motherboard manual to understand what they mean.
- Some motherboards have diagnostic LEDs or a small display showing POST codes. Refer to the manual for these codes.
- Test with Known Good Components (If Possible): This is where having spare parts is invaluable.
- Power Supply Unit (PSU): A failing or inadequate PSU can cause all sorts of strange issues that mimic motherboard or BIOS failures. If you have a known good PSU, try swapping it.
- RAM: Try a different, known good RAM stick. RAM issues are very common causes of no-POST situations.
- Graphics Card (GPU): Try a different, known good GPU, or switch to integrated graphics if your CPU/motherboard supports it.
- Attempt BIOS Recovery/Re-flash (If BIOS Corruption is Strongly Suspected):
- If your motherboard has USB BIOS Flashback or a similar feature, this is a good step if symptoms align with BIOS corruption (e.g., after a failed update). Follow manufacturer instructions meticulously.
- Isolate the Motherboard/CPU:
- If you’ve tested PSU, RAM, and GPU with known good parts, and cleared CMOS, and the problem persists (especially a no-POST, no-beep scenario), the issue is more likely the motherboard, CPU, or a deep BIOS corruption/failure.
- Testing CPU requires another compatible motherboard, or testing another compatible CPU on your current motherboard. This is often where DIY troubleshooting hits a limit without extensive spare parts.
When to Specifically Suspect the BIOS 💡
- Problems started immediately after a BIOS update attempt (successful or failed).
- BIOS settings cannot be saved, or changes are lost despite a good CMOS battery.
- Specific error messages like „BIOS ROM checksum error,” „CMOS checksum bad,” or „Boot block compatible version error.”
- The system powers on, fans spin, keyboard lights might flash, but there’s absolutely no video output and no beep codes. This can indicate a dead BIOS chip or very severe corruption where even the beep code routine can’t run.
- The system fails to recognize a new CPU or RAM that is listed as compatible (may need a BIOS update, or the update process itself is the issue).
When to Specifically Suspect the Motherboard 💡
- Visible physical damage: Burnt spots, bulging/leaking capacitors, damaged sockets/connectors, cracked PCB.
- No power at all, even after testing the PSU separately (e.g., with a PSU tester or the paperclip test – search „PSU paperclip test” for instructions, proceed with caution).
- System powers on briefly (fans spin for a second) then immediately shuts down (often a sign of a short circuit or critical power delivery failure on the motherboard).
- A distinct burning smell from the PC case.
- Specific ports or slots consistently not working (e.g., only one RAM slot works, multiple USB ports are dead) after ruling out cables, devices, and drivers.
- Random reboots, freezes, or instability that persists even after a clean OS installation, and testing/replacing RAM, GPU, and PSU.
- Catastrophic failure after a major event like a liquid spill or severe power surge/lightning strike (though PSU might also be a victim).
- Failure of multiple integrated components simultaneously (e.g., onboard audio, LAN, and several USB ports all stop working around the same time often points to chipset or power issues on the motherboard).
Conclusion
Troubleshooting BIOS and motherboard issues can undoubtedly be one of the more complex aspects of PC repair. The symptoms often overlap, and a definitive diagnosis requires patience, a systematic approach, and sometimes, spare components for testing.
By understanding the distinct roles of the BIOS and motherboard, recognizing common symptoms, and following a logical troubleshooting path, you can significantly increase your chances of correctly identifying the culprit. Always consult your motherboard manual for specific information on beep codes, diagnostic LEDs, and BIOS recovery procedures. While clearing the CMOS, reseating components, and careful observation can solve many problems, remember that for issues like a physically damaged motherboard or a bricked BIOS without recovery options, replacement is often the most practical and cost-effective solution. If you’re ever unsure or uncomfortable proceeding, seeking help from a qualified PC technician is always a wise decision.