


When a laptop breaks down, the immediate concern is often about repair or replacement. However, an equally critical, if not more important, consideration is the sensitive personal and confidential data stored on its hard drive or solid-state drive. Simply discarding or sending a broken laptop for repair without properly addressing the stored data can lead to privacy breaches, identity theft, or exposure of confidential information.
It’s crucial to understand that simply deleting files and emptying the Recycle Bin (or Trash on a Mac) does not remove the data. It merely removes the pointers to the files, making the space available for new data. The original data often remains recoverable with specialized software until it’s overwritten.
⚠️ Initial Assessment: Understanding the State of Your Laptop
Before you can decide on the best data wiping method, you need to assess the condition of your laptop. The approach will vary significantly based on whether the laptop powers on, if the operating system (OS) boots, and if the storage drive itself is functional and accessible.
-
Does the laptop power on at all?
- Yes, it powers on: Can it boot into the operating system (Windows, macOS, Linux)? Or does it get stuck, show errors (like the Blue Screen of Death), or only reach the BIOS/UEFI settings?
- No, it doesn’t power on: This could be due to a failed motherboard, power supply issue, or other critical hardware failures. The storage drive might still be perfectly fine.
-
What type of storage drive does it have?
- Hard Disk Drive (HDD): Traditional magnetic spinning platters. Data wiping often involves overwriting the entire drive multiple times.
- Solid State Drive (SSD): Uses flash memory. Wiping methods differ due to technologies like wear leveling and TRIM. Standard overwriting methods are less effective and can reduce the lifespan of an SSD. Specific commands like ATA Secure Erase or NVMe Format are preferred.
-
Is the storage drive physically damaged?
- If the laptop was dropped or suffered significant physical trauma, the storage drive itself might be damaged. In such cases, data recovery might be difficult, but so could reliable software-based wiping.
Methods for Data Erasure Based on Laptop Condition
Here are several methods to securely sanitize your data, categorized by the common states of a broken laptop.
Scenario 1: Laptop Powers On and Operating System is Accessible (Even if Unstable)
If your laptop still powers on and you can boot into Windows, macOS, or Linux, even if it’s slow or crashes intermittently, you have several good software-based options. Always back up any data you wish to keep before proceeding with any erasure method.
For Windows 10 and 11: Reset This PC with Drive Cleaning 🧹
Windows has a built-in feature that can securely erase your data.
- Go to Settings.
- Click on Update & Security (Windows 10) or System then Recovery (Windows 11).
- Under „Reset this PC,” click Get started.
- Choose Remove everything. This option deletes all your personal files, apps, and settings.
- You’ll then have two options: Just remove my files (quicker, but less secure) or Fully clean the drive (slower, but much more secure as it overwrites data). Select „Fully clean the drive.”
- Why this is more secure: The „Fully clean the drive” option performs a more thorough erasure, making data recovery significantly harder. It’s not as robust as specialized multi-pass wiping software for HDDs but is generally sufficient for most users, especially for SSDs where it may trigger the drive’s internal secure erase functions.
- Confirm and start the reset process. This can take several hours. Ensure the laptop is plugged into a power source.
For macOS: Disk Utility in Recovery Mode 🍏
macOS provides robust tools for disk erasure.
- Shut down your Mac.
- Boot into Recovery Mode:
- For Intel-based Macs: Turn on your Mac and immediately press and hold Command (⌘) + R until you see an Apple logo or other image.
- For Macs with Apple Silicon (M1, M2, etc.): Press and hold the power button until you see the startup options window. Click Options, then click Continue.
- In the macOS Utilities window, select Disk Utility and click Continue.
- In the Disk Utility sidebar, select the volume you want to erase (usually Macintosh HD or your main startup disk).
- Click the Erase button in the toolbar.
- Enter a name for the disk after it’s erased (e.g., „Macintosh HD”).
- For increased security (especially on HDDs): Click Security Options (if available). This button might not be present or might offer limited options on Macs with SSDs and T2 Security Chips or Apple Silicon, as these drives use hardware-level encryption and secure erase capabilities that are engaged differently.
- If Security Options are available, you can choose how thoroughly you want to erase the data. The most secure option involves multiple passes of writing data. For SSDs, this is generally not necessary and can be detrimental; the standard erase is typically secure enough due to how SSDs manage data and encryption. Apple’s FileVault encryption, if enabled, means that erasing the encryption keys effectively renders the data inaccessible.
- Click Erase, then click Done.
- You can then reinstall macOS or shut down the Mac.
Using Third-Party Bootable Data Wiping Software (e.g., DBAN for HDDs) 💿
For a very thorough wipe, especially on HDDs, tools like Darik’s Boot and Nuke (DBAN) are popular. DBAN is designed to securely erase entire hard drives. Important Note: DBAN may not be the best choice for SSDs as it can cause unnecessary wear and might not securely erase all data due to SSD-specific features like wear-leveling and over-provisioning. For SSDs, manufacturer-provided tools or ATA Secure Erase / NVMe Format are preferred (see Scenario 2 and 3).
- Download DBAN: Go to the official DBAN website and download the ISO image.
- Create a Bootable USB Drive or CD/DVD: Use software like Rufus (Windows) or BalenaEtcher (Windows/macOS/Linux) to create a bootable USB drive from the DBAN ISO.
- Boot from the DBAN Media:
- Insert the bootable USB/CD into your broken laptop.
- Restart the laptop and enter the BIOS/UEFI settings (usually by pressing F2, F10, F12, DEL, or ESC during startup).
- Change the boot order to prioritize the USB drive or CD/DVD drive.
- Save changes and exit. The laptop should now boot into DBAN.
- Using DBAN:
- DBAN has a simple text-based interface.
- You can type
autonukefor an automatic wipe using a standard method (DoD 5220.22-M short). - Alternatively, you can choose specific drives and wiping methods (e.g., Gutmann, PRNG Stream). Be aware that more complex methods take significantly longer.
- Double-check you are selecting the correct drive if multiple drives are present. DBAN will irreversibly erase data.
- Let DBAN complete the process. This can take many hours, or even days, for large drives or multiple-pass methods.
Scenario 2: Laptop Powers On, but Operating System Does Not Boot (or is Inaccessible)
If the laptop powers on but Windows or macOS won’t load correctly, you can often still use bootable utilities or, if comfortable, remove the drive.
Using Bootable Wiping Software (as described above)
This is the same method as using DBAN or other bootable disk wiping utilities (like Parted Magic, which includes secure erase tools for both HDDs and SSDs). Since the OS isn’t loading, booting directly from an external USB drive is the primary way to run such software.
Using a Windows or Linux Installation Media for Drive Commands
If you have a Windows installation USB/DVD or a Linux Live USB, you can boot from it and use command-line tools to wipe the drive.
- For Windows Installation Media:
- Boot from the Windows installation media.
- Choose your language, then click „Repair your computer” instead of „Install now.”
- Go to Troubleshoot > Advanced options > Command Prompt.
- In the Command Prompt, you can use
diskpartcommands.- Type
diskpart - Type
list disk(to identify your target disk number) - Type
select disk X(where X is the number of your target disk) - Type
clean all(This command writes zeros to every sector of the disk, effectively erasing it. It can take a long time. For SSDs, this isn’t the ideal method but is better than justcleanwhich only removes partitioning information.)
- Type
- For Linux Live USB (e.g., Ubuntu):
- Boot from the Linux Live USB.
- Choose „Try Ubuntu” (or similar option for other distributions).
- Open a Terminal.
- You can use commands like
shredordd.sudo fdisk -lto list drives and partitions (e.g.,/dev/sda).- Using
dd(Very Powerful, Very Dangerous – Use with Extreme Caution):sudo dd if=/dev/zero of=/dev/sdX bs=4M status=progress(replacesdXwith your actual drive identifier). This writes zeros to the entire drive.sudo dd if=/dev/urandom of=/dev/sdX bs=4M status=progress(writes random data, potentially more secure but slower). - Using
shred(Designed for Secure Deletion):sudo shred -vzn 3 /dev/sdX(replacesdXwith your actual drive.-vfor verbose,-zfor a final pass of zeros,-n 3for 3 overwriting passes).shredis often better for HDDs.
- For SSDs, if possible, try to use
hdparmfor ATA Secure Erase ornvme-clifor NVMe Format. This requires more advanced knowledge. For example, withhdparm(after identifying the drive, e.g.,/dev/sda):sudo hdparm -I /dev/sda(Check if drive is frozen. If so, you might need to power cycle the drive internally, sometimes by putting the laptop to sleep and waking it, while booted from USB. This is tricky.)sudo hdparm --user-master u --security-set-pass EIGENPASWD /dev/sda(Set a temporary password)sudo hdparm --user-master u --security-erase EIGENPASWD /dev/sda(Execute secure erase. This can take a few minutes for SSDs.) For more on ATA Secure Erase, research its specific implementation, as it can be complex. A useful resource might be the Arch Linux Wiki page on SSD memory cell clearing.
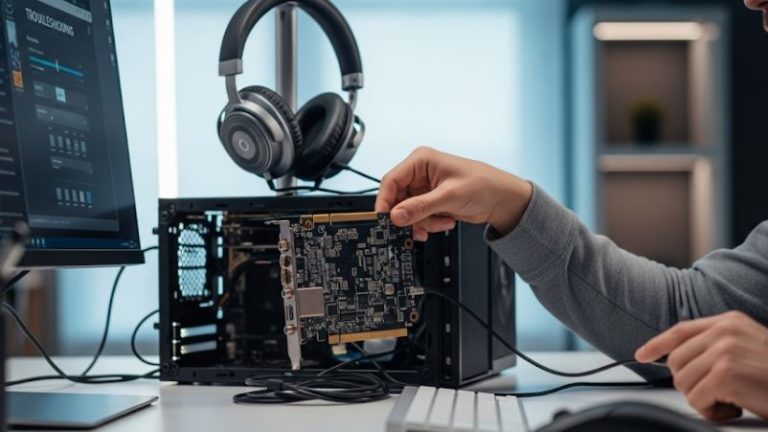
Scenario 3: Laptop Does Not Power On, or You Prefer to Remove the Drive 🔩
If the laptop is completely dead, the most reliable method is to physically remove the storage drive and connect it to another working computer.
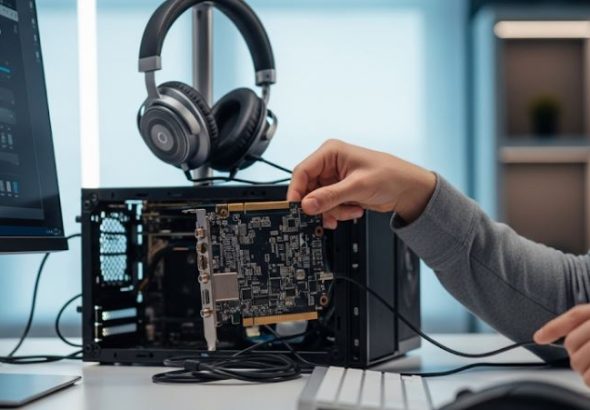
Step 1: Safely Removing the Storage Drive
Disclaimer: Opening your laptop can void the warranty (though if it’s broken, this may be less of a concern) and carries a risk of damaging components if not done carefully. Proceed at your own risk. If you’re uncomfortable, seek professional help.
- Gather Tools: You’ll typically need small Phillips head screwdrivers, possibly Torx screwdrivers, and a plastic prying tool (spudger) or guitar pick to open the casing without scratching it. An anti-static wrist strap is highly recommended to prevent electrostatic discharge damage to components.
- Find a Guide: Search online for a disassembly guide for your specific laptop model (e.g., „HP Spectre x360 13-ap0000 disassembly” or check sites like iFixit which offer detailed repair guides).
- Power Down and Disconnect: Ensure the laptop is completely off and disconnected from the power adapter. If the battery is removable from the outside, remove it. If internal, you’ll disconnect it once the case is open.
- Open the Laptop Case: Carefully remove the screws and use the prying tool to release the clips holding the bottom panel or keyboard deck (depending on the model).
- Locate the Storage Drive:
- 2.5-inch SATA Drive (HDD or SSD): A rectangular drive, typically about 2.75 x 4 inches, connected by a SATA data and power cable.
- M.2 SSD: A small, stick-like circuit board plugged directly into a slot on the motherboard. It’s usually secured by a small screw at one end.
- Disconnect and Remove:
- Internal Battery: If not already removed, carefully disconnect the internal battery connector from the motherboard before touching other components.
- SATA Drive: Gently unplug the SATA connector and lift the drive out. It might be in a caddy secured by screws.
- M.2 SSD: Remove the retaining screw, and the M.2 drive will usually pop up at an angle. You can then gently pull it out of the slot.
Step 2: Connecting the Removed Drive to Another Computer
You’ll need an external drive enclosure or adapter:
- For 2.5-inch SATA drives: A USB-to-SATA adapter or a 2.5-inch USB external enclosure.
- For M.2 SSDs: A USB M.2 SSD enclosure. Crucially, ensure the enclosure matches your M.2 drive type (SATA M.2 or NVMe M.2, and the keying – B key, M key, or B+M key). Using the wrong enclosure won’t work and could potentially damage the drive or enclosure.
Once connected to a working computer, the drive should appear as an external storage device.
Step 3: Wiping the Connected Drive Using the Working Computer
Now that the drive is connected to another PC, you can use various software tools on the working computer to wipe the removed drive.
- Windows:
- Disk Management: You can format the drive, but a simple format isn’t secure.
diskpartcommand (as above): Useclean allfor a more secure wipe on HDDs.- Third-party Software: Tools like Eraser (free, open-source, for HDDs) or manufacturer-specific SSD toolboxes (e.g., Samsung Magician, Crucial Storage Executive) often have secure erase functionalities. For SSDs, these manufacturer tools are highly recommended as they can correctly trigger the ATA Secure Erase or NVMe Format commands.
- macOS:
- Disk Utility: Connect the drive, open Disk Utility, select the external drive, click Erase, and choose security options if it’s an HDD. For SSDs, the standard erase is usually sufficient.
- Linux:
- Use GParted (a graphical partition editor) or command-line tools like
dd,shred,hdparm(for ATA Secure Erase on SATA SSDs), ornvme-cli(for NVMe Format on NVMe SSDs) as described earlier.
- Use GParted (a graphical partition editor) or command-line tools like
A Note on SSDs (Solid State Drives): SSDs work differently from HDDs. Due to features like wear leveling (distributing writes evenly to prolong lifespan) and over-provisioning (extra storage space not visible to the OS), traditional multi-pass overwriting methods (like those in DBAN or shred) are often ineffective and can prematurely wear out the drive.
The most effective ways to securely erase an SSD are:
- ATA Secure Erase / NVMe Format: These are firmware commands built into the drive. They instruct the drive’s controller to reset all storage cells to their initial empty state or to flush its mapping tables and re-encrypt its data with a new key, effectively rendering the old data inaccessible. This is fast and effective. Manufacturer SSD utility software often provides an easy interface for this. Bootable Linux utilities like Parted Magic can also execute these commands.
- Full Drive Encryption (Proactive): If your drive was already encrypted with a strong password using something like BitLocker (Windows), FileVault (macOS), or LUKS (Linux), and you securely discard or forget the encryption key, the data becomes practically unrecoverable. Erasing the key is much faster than wiping the entire drive. However, if the goal is to reuse or sell the drive, you’d still want to perform a secure erase after cryptographic erasure (destroying the keys).
Scenario 4: Drive is Physically Damaged, or Maximum Security is Required – Physical Destruction 🔨🔥
If the storage drive is known to be physically damaged (e.g., making loud clicking noises, not recognized by any computer), or if the data is so sensitive that no risk of recovery can be tolerated, physical destruction is the ultimate solution. Software-based wiping relies on the drive being functional enough to write to all its sectors. If it’s not, data may remain.
Methods for Physical Destruction:
- Drilling (HDDs and SSDs):
- HDDs: Drill multiple holes directly through the platters. The platters are usually made of aluminum or glass and store the magnetic data. Aim for several holes across the surface.
- SSDs: Drill through the NAND flash memory chips. These are the small black rectangular chips on the SSD’s circuit board.
- Safety: Wear safety goggles and gloves. Metal shavings can be sharp.
- Hammering (HDDs and SSDs):
- HDDs: Place the drive on a hard, stable surface (e.g., concrete) and use a heavy hammer to severely dent and deform the casing and internal platters. The goal is to shatter glass platters or warp metal ones beyond usability.
- SSDs: Smash the NAND flash chips.
- Safety: Wear safety goggles, gloves, and be mindful of flying debris.
- Disassembly and Platter/Chip Destruction (More Thorough):
- HDDs: Open the hard drive casing (often requires Torx screwdrivers). Remove the platters. You can then shatter them (if glass) or heavily scratch, sand, or bend them (if metal).
- SSDs: Pry off or crush the individual NAND flash memory chips from the circuit board.
- Professional Shredding Services: Many companies offer secure media destruction services. They use industrial shredders that reduce drives to tiny particles. This is often certified and is a good option for businesses or highly sensitive data. Check for services compliant with standards like NAID AAA certification.
- Degaussing (HDDs Only): Uses a powerful magnetic field to neutralize the magnetic data on HDD platters. Requires specialized, expensive equipment and is ineffective for SSDs.
- Incineration/Melting: Extreme, but effective. Not practical for most individuals.
Important Safety Considerations for Physical Destruction:
- Always wear safety glasses to protect your eyes from flying debris.
- Wear sturdy gloves to protect your hands.
- Work in a well-ventilated area if creating dust or fumes.
- Be aware that SSDs and other electronics may contain materials that are hazardous if burned or improperly disposed of. Check local regulations for e-waste disposal.
What NOT to Do (Common Misconceptions)
- Simply Deleting Files and Emptying the Recycle Bin/Trash: This only removes pointers to the files. The data remains easily recoverable.
- Quick Formatting the Drive: This primarily rebuilds the file system and marks the space as empty but doesn’t usually overwrite the actual data. A „Full Format” in Windows does overwrite with zeros, but it’s slow and not as configurable as dedicated tools.
- Assuming a „Broken” Laptop Means Data is Gone: Even if the laptop doesn’t boot, the storage drive is often intact and readable if removed.
- Submerging in Water (for HDDs/SSDs): While water can damage electronics, specialized data recovery services can sometimes still retrieve data from water-damaged drives. It’s not a reliable method of destruction.
When to Seek Professional Assistance 🧑🔧
If you are uncomfortable with any of these steps, especially with physically disassembling your laptop or handling command-line tools, or if the data is extremely valuable or sensitive, it’s wise to seek help from a reputable IT professional or a data destruction service. They have the expertise and tools to handle the process securely.
Conclusion: Prioritizing Your Data Security
Dealing with a broken laptop is frustrating, but overlooking the data it contains can have far more severe consequences. By understanding the state of your device and choosing the appropriate erasure method – whether it’s built-in OS utilities, specialized software, removing the drive, or physical destruction – you can significantly mitigate the risk of your personal or confidential information falling into the wrong hands. Taking these proactive steps is a crucial aspect of responsible data management in our digital age. 🛡️