The Google Pixel line of smartphones represents Android as Google intended it: clean, fast, and unburdened by third-party skins or bloatware. It’s often called „pure Android.” Yet, for a dedicated community of enthusiasts and power users, even this pristine experience is just a starting point. The true frontier of customization and control lies beyond the factory settings, in a process known as rooting.
What exactly is rooting?
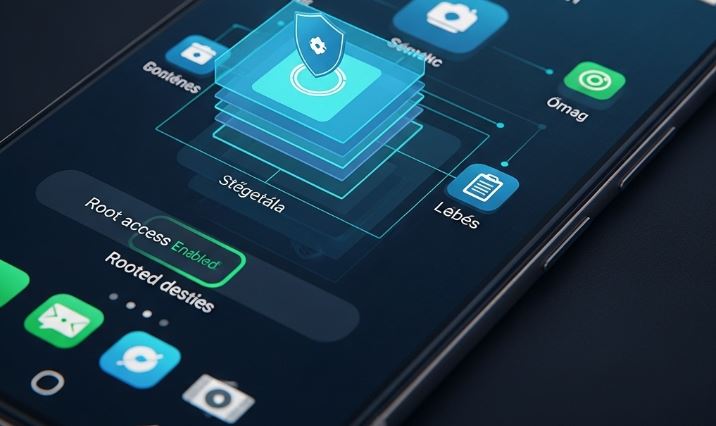
At its core, rooting is the process of gaining privileged control—known as „root access” or „superuser permissions”—over an Android device. Think of it as becoming the administrator of your phone’s operating system. By default, for security reasons, users and apps are locked out of certain system-level files and directories. Rooting breaks down these barriers, giving you the ability to modify the software code on a fundamental level.
The benefits: Why root a Google Pixel?
You might wonder why anyone would want to tamper with the already excellent software on a Pixel. The motivations are diverse and powerful:
- Complete Customization: Go beyond widgets and launchers. With root, you can change system fonts, alter the boot animation, and use powerful theming engines to change the look of the entire operating system.
- Enhanced Performance: Root access allows you to install custom kernels that can overclock or underclock the CPU for better performance or improved battery life. You can also remove unwanted system apps (even those from Google) that run in the background.
- Powerful Applications: Some of the most potent apps on Android require root access. This includes advanced backup tools like Titanium Backup, powerful ad-blockers like AdAway that work system-wide, and audio enhancers like Viper4Android.
- Full Device Backups: Create a true, complete snapshot of your entire system—apps, data, and system settings included. This is invaluable for recovery or when migrating to a new device.
- Bypassing Carrier Restrictions: Root can help in removing carrier-installed bloatware or enabling features that might be blocked, like the built-in tethering functionality.
The risks: A word of caution ⚠️
Rooting is not without its significant risks, and it’s crucial to understand them before you begin.
- Bricking Your Device: If the process goes wrong, you could be left with a „brick”—a device that won’t turn on or function at all. While often recoverable (a „soft brick”), there is a small chance of permanent damage (a „hard brick”).
- Voiding Your Warranty: In most cases, unlocking the bootloader (a necessary first step) will void your device’s warranty. You will be on your own if a hardware issue arises.
- Security Vulnerabilities: Rooting fundamentally bypasses many of Android’s built-in security protections. A malicious app, if granted superuser permissions, could cause catastrophic damage to your data and device.
- Blocking of Certain Apps: Many security-conscious applications, particularly banking apps and payment services like Google Pay, will not run on a rooted device. While modern rooting tools like Magisk have ways to circumvent this, it’s a constant cat-and-mouse game.
- OTA Update Issues: You will no longer be able to install official Over-the-Air (OTA) updates from Google in the standard way. The process becomes more manual.
Chapter 1: The preparatory phase – Laying the groundwork
Preparation is 90% of the success in this process. Do not skip these steps. Rushing is the surest way to encounter problems.
1. The all-important backup 💾
We cannot stress this enough: The first step of the rooting process will completely wipe all data from your device. This includes photos, videos, messages, apps, and documents. Back up everything that is important to you.
- Google One Backup: Use the built-in Android backup feature (Settings > Google > Backup) to save app data, contacts, and settings to your Google account.
- Photos and Videos: Ensure everything is backed up to Google Photos or another cloud service, or manually transfer them to a computer.
- Files: Manually copy any important documents, music, or downloads from your phone’s internal storage to a PC or cloud drive.
2. Understanding the key tools and terms
- Android SDK Platform-Tools (ADB & Fastboot): This is a package of command-line tools for your computer that allows you to communicate with your Android device.
- ADB (Android Debug Bridge): Used when the device is running the full Android OS. It’s for tasks like transferring files and rebooting the device into different modes.
- Fastboot: Used when the device is in the bootloader menu. It’s for flashing images to the phone’s partitions, like the boot image or a full factory image. You can download the official tools directly from Google’s developer website.
- The Bootloader: The bootloader is the first piece of software that runs when you turn on your phone. It’s responsible for initiating the hardware and loading the Android operating system. By default, it’s locked to prevent unauthorized software modifications. We must unlock it to proceed.
- Magisk – The Systemless Root: Magisk is the modern, de facto standard for rooting Android devices. Its key innovation is the concept of „systemless” rooting. Instead of modifying the core system files (the
/systempartition), Magisk modifies the boot image. This makes it less intrusive, easier to uninstall, and, crucially, better at hiding its presence from other apps. You can learn more about its development on its official GitHub page. - Google Factory Image: This is a complete, stock firmware package for your specific Pixel model. It contains all the necessary files to restore your phone to its original state. We will need this to extract a clean
boot.imgfile. It’s also your primary tool for unbricking your device if something goes wrong.
3. Setting up your computer and Pixel
⚙️ On your Google Pixel:
- Enable Developer Options: Go to Settings > About phone. Scroll to the bottom and tap on the Build number seven times in a row. You’ll see a message saying, „You are now a developer!”
- Enable USB Debugging: Go to the newly available Settings > System > Developer options. Find the USB debugging toggle and enable it. This allows your PC to communicate with your phone via ADB.
- Enable OEM Unlocking: In the same Developer options menu, find the OEM unlocking toggle and enable it. This is the critical switch that permits the bootloader to be unlocked. If this option is greyed out, it may be because your device was purchased from a carrier that forbids unlocking (like Verizon in the US). In that case, you cannot proceed.
💻 On your Computer:
- Download the SDK Platform-Tools from Google’s official site (linked above).
- Extract the ZIP file to a memorable and easily accessible location on your computer (e.g.,
C:\platform-toolson Windows or/Users/YourUser/platform-toolson macOS/Linux). - Open a command prompt (Terminal on macOS/Linux, or PowerShell/Command Prompt on Windows) in this folder. An easy way to do this on Windows is to navigate to the folder in File Explorer, type
cmdin the address bar, and press Enter.
Chapter 2: The core procedure – Unlocking and rooting step-by-step
With all preparations complete, it’s time to begin the main procedure. Follow these steps meticulously.
Step 1: Unlock the bootloader
This is the point of no return. Once you execute this command, your phone will be wiped.
- Connect your Pixel to your computer with a high-quality USB cable.
- On your phone, you should see a pop-up asking to „Allow USB debugging?”. Check the box for „Always allow from this computer” and tap Allow.
- In your command prompt/terminal on the computer, type the following command to verify the connection:
adb devicesYou should see your device’s serial number listed. If it says „unauthorized,” you need to accept the prompt on your phone. If it’s blank, check your cable and driver installation.
- Now, reboot your device into the bootloader menu with this command:
adb reboot bootloader - Your phone will restart and show a screen with Android’s mascot and some device information. This is fastboot mode.
- To unlock the bootloader, enter the following command:
fastboot flashing unlock - On your Pixel’s screen, you will see a confirmation prompt. Use the volume keys to highlight „Unlock the bootloader” and press the power button to select it.
- The device will unlock and restart. This process wipes all data. Let the phone boot back into the initial Android setup screen. You don’t need to complete the setup yet; just power it off.
Your bootloader is now unlocked. Each time you restart your phone, you will see a brief warning message telling you that the bootloader is unlocked. This is normal.
Step 2: Obtain the clean boot image
- You need the official Factory Image that exactly matches the software build currently on your phone. Boot your phone, complete the initial setup (skip signing in to save time), and go to Settings > About phone. Note down the Build number at the bottom (e.g.,
AP1A.241005.005). - Go to the Google Pixel Factory Images page. Find your device (e.g., „oriole” for Pixel 6) and download the factory image that corresponds to your exact build number.
- Extract the downloaded ZIP file. Inside, you will find another ZIP file (e.g.,
image-oriole-ap1a...zip). Extract this second file as well. - Inside the final extracted folder, you will find a file named
boot.img. This is the clean, unpatched boot image for your device. Copy this file.
Step 3: Patch the boot image with Magisk
- First, you need to install the Magisk application on your Pixel. Download the latest Magisk APK from its official source.
- Connect your phone to your PC and transfer the
boot.imgfile (from the previous step) and theMagisk.apkfile to your Pixel’s „Download” folder. - Using a file manager app on your Pixel, install the
Magisk.apk. You may need to grant permission to install apps from unknown sources. - Open the Magisk app. You will see it says „Magisk: N/A” because it’s not yet installed.
- Tap the Install button at the top.
- Choose the option „Select and Patch a File”.
- Navigate to your „Download” folder and select the
boot.imgfile you transferred earlier. - Magisk will now patch this boot image. It will save a new file, typically named
magisk_patched-[random_strings].img, in your „Download” folder. - Connect your phone back to your computer and copy this newly created
magisk_patched-....imgfile from your phone’s Download folder back to theplatform-toolsfolder on your PC.
Step 4: Flash the patched boot image
- Reboot your Pixel back into the bootloader mode:
adb reboot bootloader - Once in fastboot mode, flash the patched boot image to your device. Be sure to use the exact filename of your patched file. The command is:
fastboot flash boot magisk_patched-....imgWait for the terminal to show a „Finished” message.
- Finally, reboot your phone normally:
fastboot reboot
Step 5: Finalize and verify ✅
- Once your phone has fully rebooted, find and open the Magisk app again.
- The app may prompt you to perform a one-time, additional setup and then reboot. Allow it to do so.
- After the final reboot, open the Magisk app one more time. It should now show a version number next to „Magisk,” and the Superuser and Modules tabs will be available at the bottom.
Congratulations! Your Google Pixel is now rooted. You can verify this by downloading a „Root Checker” app from the Play Store, which will prompt for superuser permissions.
Chapter 3: Life after root – Managing your powerful device
Rooting is just the beginning. The real fun is in what you can do with it.
- Managing Superuser Permissions: When a root-enabled app runs for the first time, a prompt from Magisk will appear asking you to grant or deny it superuser access. Be very careful about which apps you grant this power to.
- Hiding Root with Zygisk: In the Magisk settings, enable Zygisk. Then, in the section labeled „Enforce DenyList,” you can select specific apps (like Google Pay or your banking app) from which to hide root access. This improves your chances of them working correctly.
- Exploring Modules: The Modules tab in Magisk is where the magic happens. Here you can install powerful modifications packaged as simple ZIP files. You can find these modules on forums like XDA-Developers, the premier community for Android modification. Popular modules include system-wide ad-blockers, audio equalizers, and custom emoji packs.
A note on OTA updates
When Google releases a monthly security patch, you cannot simply tap „Install.” Doing so will fail or remove your root access. The proper method involves using Magisk to manage the update:
- When an OTA update is available, do not download it yet.
- First, go into the Magisk app and choose Uninstall Magisk > Restore Images. This will restore your original, unpatched boot image.
- Now, go to Settings > System > System update and download and install the OTA. Do not reboot when it finishes.
- Go back into the Magisk app and choose Install > Install to Inactive Slot (After OTA).
- Let Magisk do its work, and then press the reboot button it provides.
Your device will reboot with the latest update and with root access preserved.
Disclaimer: This article is for informational purposes only. The process of rooting your device carries significant risks, including but not limited to voiding your warranty, bricking your device, and creating security vulnerabilities. The author and the publishing platform assume no responsibility for any damage that may occur to your device as a result of following this guide. Proceed at your own risk. We are not liable for any typographical errors or inaccuracies in this article.


